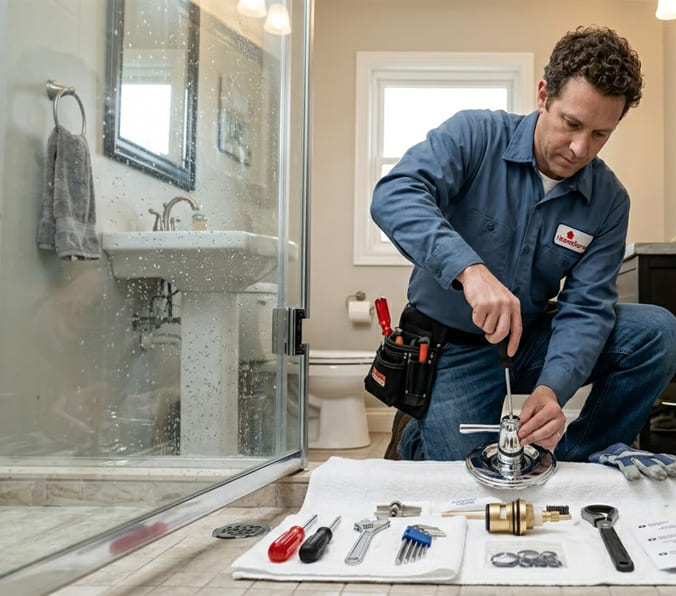
A dripping shower faucet isn’t just an annoyance that keeps you up at night; it’s a constant waste of water and money. Before you consider the costly and complex job of replacing the entire fixture, you should know that the culprit is almost always a small, inexpensive part: the faucet cartridge. Think of the cartridge as the “heart” of your faucet—it’s the core component that controls water flow, temperature, and the on/off function.
When your shower starts dripping, the temperature control becomes erratic, or the handle feels stiff, a simple cartridge replacement is usually the solution. This definitive guide is designed to empower you to tackle this common repair yourself. With basic tools and about 30 minutes, you can fix your faucet, restore perfect function, and save hundreds of dollars in plumber fees.
Last Updated: March 2026 | Estimated Reading Time: 16 minutes
In This Guide, You Will Master:
- Safety & Diagnosis: How to safely prepare your workspace and confidently diagnose a faulty cartridge.
- Cartridge Identification: A clear guide to identifying and purchasing the exact replacement part you need.
- Step-by-Step Replacement: A detailed, illustrated walkthrough for removing the old cartridge and installing the new one.
- Pro Troubleshooting: Solutions for common problems like a stuck cartridge or persistent leaks after replacement.
- Preventive Maintenance: Expert tips to dramatically extend the life of your new faucet cartridge.
Part 1: Safety First and Accurate Diagnosis
Before you touch a single screw, preparation is key. Rushing this step can lead to a bigger mess or damage to your fixture. Let’s get it right from the start.
Essential Pre-Work Safety Steps
- Shut Off the Water Supply: This is non-negotiable. Locate the main water shut-off valve for your house and turn it clockwise until it’s fully closed. Alternatively, if your bathroom has dedicated shut-off valves (angle stops) for the shower, you can close those instead.
- Relieve Water Pressure: After shutting off the water, turn the shower faucet handle to the “on” position in the middle (mixed temperature). This will drain any remaining water and relieve pressure in the pipes, preventing a surprise shower when you start disassembly.
- Protect Your Workspace: Place a thick towel or a drain cover over the shower drain. This small step is a lifesaver, preventing tiny screws or parts from getting lost forever down the drain.
Your Essential Toolkit
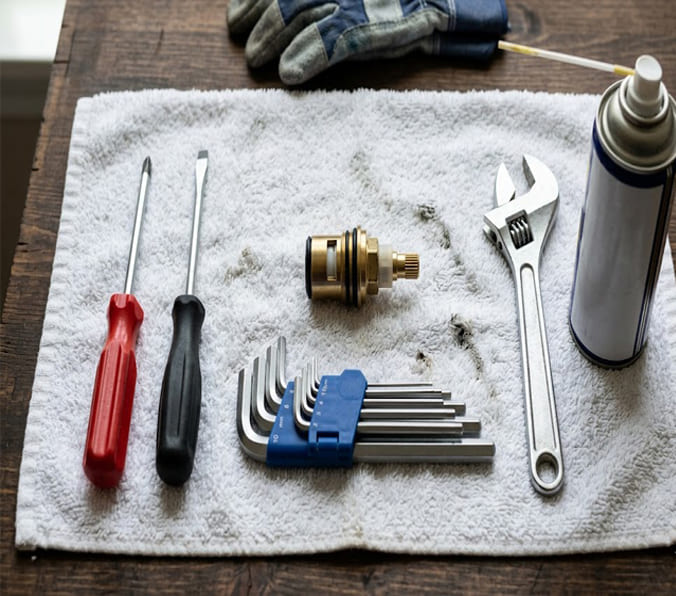
Gathering your tools beforehand makes the job smooth and frustration-free. Here’s what you’ll typically need.
| Tool / Item | Primary Use | Pro Tip |
|---|---|---|
| New Faucet Cartridge | The replacement part. | Bring the old one to the store or use precise photos/measurements to ensure a perfect match. |
| Screwdriver Set | Removing the handle screw (Phillips or flathead). | A multi-bit screwdriver is a great all-in-one tool for this. |
| Allen Wrench Set (Hex Keys) | For handles with a hidden set screw. | Both metric and imperial sets are good to have, as set screw sizes vary widely. |
| Adjustable Wrench / Pliers | To loosen the bonnet nut or retaining clip. | Wrap the jaws in electrical tape or use a cloth to avoid scratching the faucet’s finish. |
| Penetrating Oil (like WD-40) | To loosen stubborn, corroded parts. | A little goes a long way. Let it sit for 10-15 minutes for maximum effect. |
| Utility Knife | To gently score old caulk or cut away mineral deposits. | Use with caution and keep the blade angled away from the faucet finish. |
| Flashlight or Headlamp | To see clearly inside the faucet body. | A headlamp is ideal as it keeps your hands free. |
| Old Towels / Rags | For cleaning, gripping, and protecting surfaces. | Essential for wiping up residue and keeping the area clean. |
Part 2: Identifying and Sourcing the Correct Cartridge
This is the most critical step. Installing the wrong cartridge will fail 100% of the time. There are four main types you might encounter.
The 4 Common Types of Faucet Cartridges
| Cartridge Type | Description & How it Works | Common Brands & Use Cases |
|---|---|---|
| Ceramic Disc Cartridge | (Most Common) Two highly polished ceramic discs rotate against each other to control flow. Extremely durable, smooth operation. | The standard in modern faucets. Brands like Sedal and Kangqin are major OEM suppliers for quality faucets. |
| Ball Cartridge | (Older Style) A plastic or metal ball with chambers inside rotates in a socket with rubber seals to mix water. | Found in many older single-handle faucets. Prone to wear on the seals and springs. |
| Compression Cartridge | (Two-Handle Faucets) A simple design where a screw compresses a rubber washer against a seat to stop flow. | Used in basic, two-handle faucets. The rubber washer is the most common failure point. |
| Thermostatic Cartridge | (High-End Showers) A complex unit with a wax or spring element that automatically adjusts hot/cold water to maintain a constant temperature. | Used in thermostatic shower systems. Must be replaced with an exact OEM part. |
How to Guarantee You Buy the Right Part
- Photograph Everything: Before you remove the old cartridge, take clear photos from multiple angles. Capture any brand names, logos, or part numbers visible on the handle or escutcheon plate.
- Measure Precisely: Once the old cartridge is removed, use calipers or a ruler to measure its key dimensions: the overall length, the diameter (common sizes are 35mm and 40mm for ceramic discs), and the shape/length of the stem.
- The Foolproof Method: Take the old cartridge with you to a dedicated plumbing supply store or a well-stocked hardware store. The experts there can match it visually. This is the best way to ensure you get a perfect fit.
- Search by Faucet Model: If you know the brand and model number of your faucet, you can often find the correct cartridge part number on the manufacturer’s website.
Pro Tip: When you buy the new cartridge, also purchase a small tube of plumber’s grease (silicone-based). Applying a thin layer to the new cartridge’s O-rings ensures a better seal and makes future removal much easier.
Part 3: The Step-by-Step Replacement Process (Ceramic Cartridge Example)

Here is the detailed process for the most common type of single-handle shower faucet.
Step 1: Remove the Handle and Trim Plate
First, look for the screw that secures the handle. It’s often hidden behind a small decorative cap (with the red/blue temperature indicator) on the front of the handle, or it could be a small set screw on the underside.
- Pry off the decorative cap with a small flathead screwdriver.
- Use the appropriate tool (screwdriver or Allen wrench) to loosen the screw. You don’t need to remove it completely, just loosen it enough to pull the handle off.
- Gently pull the handle straight off the cartridge stem. If it’s stuck, try wiggling it back and forth.
- Next, remove the decorative trim plate (escutcheon). It might be held by screws or it might simply be threaded on. If it’s threaded, turn it counter-clockwise to remove.
Step 2: Expose and Remove the Old Cartridge
With the handle and trim removed, you’ll see the top of the cartridge. It’s usually held in place by a retaining clip or a threaded bonnet nut.
- For Retaining Clips: Use needle-nose pliers or a flathead screwdriver to pull the clip straight up and out. Be careful not to bend it.
- For Bonnet Nuts: This is a large nut (often brass or plastic) threaded over the cartridge. Use your adjustable wrench or pliers to turn it counter-clockwise. If it’s stuck, apply some penetrating oil, wait 15 minutes, and try again.
Step 3: Extract the Old Cartridge
Now you can remove the cartridge itself. The stem you just removed the handle from is part of the cartridge.
- Grip the stem firmly with your pliers (wrap it in a rag to avoid scratching if you plan to reuse it for matching).
- Pull the cartridge straight out of the faucet body. You may need to wiggle it gently from side to side to break the seal of the old O-rings.
Step 4: Clean and Prepare the Faucet Body
This is a crucial step that many people skip.
- Look inside the faucet body where the cartridge was seated.
- Use a rag and a small screwdriver to carefully clean out any mineral deposits, debris, or pieces of old rubber gaskets.
- The valve body must be perfectly clean for the new cartridge to seal properly.
Step 5: Install the New Cartridge and Reassemble
You’re on the home stretch.
- Lubricate: Apply a thin film of plumber’s grease to the O-rings on the new cartridge.
- Align and Insert: Carefully align the new cartridge with the notches or holes inside the faucet body. The hot/cold sides must be oriented correctly. It should slide in smoothly without force.
- Secure the Cartridge: Re-install the retaining clip or thread on the bonnet nut. Tighten the bonnet nut until it’s snug, then give it an extra quarter-turn with the wrench. Do not over-tighten, as this can crack the new cartridge.
- Reassemble Trim and Handle: Put the trim plate and handle back on in the reverse order you removed them.
Step 6: The Final Test
- Turn the Water On Slowly: Go back to your main valve and open it just a quarter of the way. This pressurizes the system slowly.
- Check for Leaks: Go back to the shower and carefully inspect around the handle and trim plate for any drips.
- Full Test: If there are no leaks, open the main valve all the way. Now, test the faucet’s operation. Turn it on and off, and swing the handle from full hot to full cold to ensure everything is working smoothly.
Part 4: Troubleshooting and Professional Insights
Even with a perfect plan, you can hit a snag. Here’s how to solve the most common issues.
Troubleshooting Common Problems
| Symptom | Likely Cause | Solution |
|---|---|---|
| The old cartridge is completely stuck. | Severe mineral buildup or corrosion has fused it to the valve body. | Apply penetrating oil and wait 30 minutes. Use a “cartridge puller” tool, which is designed for this exact purpose and available at hardware stores. |
| It still leaks after installing the new cartridge. | 1. The new cartridge isn’t seated properly. 2. Debris is left inside the valve body. 3. The valve body itself is cracked (rare). | 1. Re-check alignment. 2. Disassemble and thoroughly re-clean the valve body interior. 3. If it still leaks, the valve body may be damaged, requiring a professional. |
| The hot and cold are reversed. | The cartridge was installed 180 degrees incorrectly. | Most ceramic cartridges can be removed and rotated 180 degrees to correct this. Refer to the new cartridge’s instructions. |
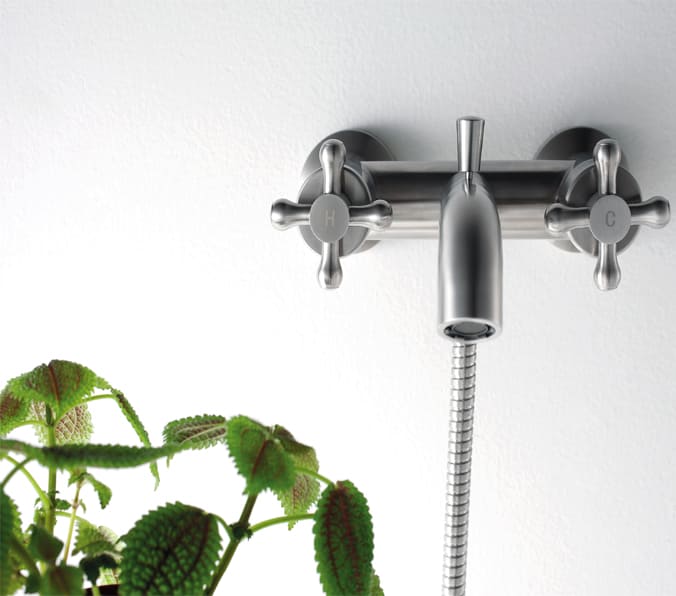
From the Factory Floor: As an OEM/ODM manufacturer, we at Springfaucet design our faucets for longevity and ease of service. Professional plumbers appreciate when a valve body is precisely machined, allowing cartridges to seat perfectly every time. It’s this hidden quality, built into products like our Modern Wall-Mount Lavatory Faucet, that prevents the most common installation headaches and ensures a leak-free result. We supply to brands and projects globally, ensuring our designs meet the practical needs of installers and the quality demands of the market.
Part 5: When Is It Time to Call a Professional Plumber?
A DIY spirit is fantastic, but it’s crucial to know your limits to avoid a small problem becoming a disaster. Call a licensed plumber if you encounter:
- A Stuck Cartridge You Cannot Budge: A professional has specialized tools like heavy-duty cartridge pullers and the experience to remove it without damaging the in-wall plumbing.
- Visible Cracks or Damage to the Faucet Body: If the brass body inside the wall is damaged, it will require professional soldering or complete replacement.
- Persistent Leaks After You’ve Tried Everything: This points to a deeper issue than the cartridge, potentially with the valve body itself or even pipe connections.
- Corroded or Inaccessible Shut-off Valves: If you can’t safely turn off the water to the work area, do not proceed.
Part 6: Preventive Maintenance to Extend Cartridge Life
A new cartridge can last for years with a little care.
- Monthly “Exercise”: Once a month, rotate the faucet handle from full hot to full cold several times. This prevents mineral deposits from seizing the moving parts.
- Address Hard Water: If you live in an area with hard water, a whole-house water softener is the single best investment to protect all your plumbing fixtures, not just your faucets.
- Gentle Operation: Avoid snapping the handle on and off forcefully. Smooth, deliberate movements put less stress on the internal ceramic discs.
Conclusion: A Small Part, A Major Impact
Successfully replacing a shower faucet cartridge is one of the most satisfying and cost-effective home repairs you can perform. It directly tackles the root cause of most leaks and performance issues, saving you from the much larger expense and hassle of replacing the entire shower valve.
The keys to success are simple: careful preparation, accurately identifying the replacement part, being patient during disassembly, and ensuring the valve body is perfectly clean before installing the new unit. By following this guide, you’ve not only fixed a problem but also gained valuable skills and a deeper understanding of how your home’s plumbing works.
Recommended Links
Internal Links:
- The Ultimate Guide to Faucet Finishes: PVD vs. Electroplating
- Kitchen Faucet Trends 2026: A Manufacturer’s Forecast
- How to Choose a Bathtub
External Links (Authoritative Sources):
- This Old House: How to Fix a Leaky Faucet – A trusted home improvement resource with video tutorials.
- Plumbing & Mechanical Magazine: The Evolution of the Faucet Cartridge – An industry publication providing deeper technical context.
- The Family Handyman: How to Replace a Faucet Cartridge – Another excellent DIY resource with step-by-step photos.