
Installing a new kitchen faucet can feel like a daunting task, poised somewhere between a simple upgrade and a call to a professional plumber. But what if I told you that with the right guidance, you can achieve a professional, leak-free result yourself? Whether you’re a DIY enthusiast upgrading your space or a business owner trying to understand what makes a faucet easy to install for your customers, this guide is for you. We’ll break down every step, demystify the jargon, and share insider tips from nearly two decades in the faucet manufacturing industry.
Last Updated: September 2026 | Estimated Reading Time: 17 minutes
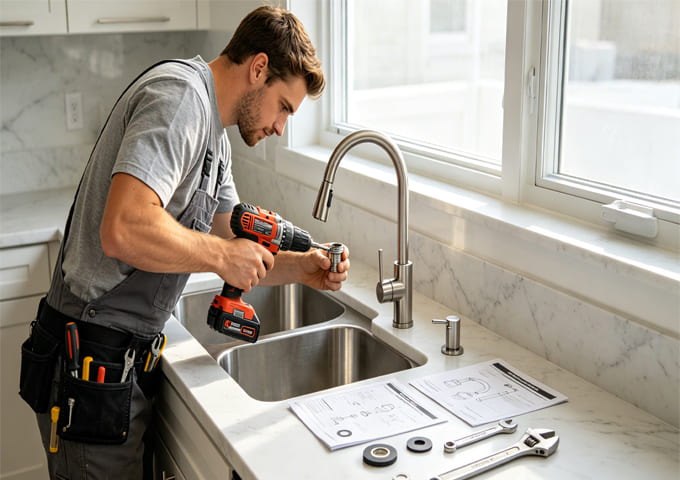
This Guide Will Show You How To:
- Prepare for Success: Gather the right tools and understand your sink’s configuration.
- Install a Single-Hole Faucet: Master the most common modern installation type.
- Tackle a Three-Hole Faucet: Confidently handle separate handles and spouts.
- Connect a Pull-Down/Pull-Out Hose: Properly install the counterweight for smooth operation.
- Prevent Leaks: Learn the pro techniques for sealing connections securely.
- Troubleshoot Common Issues: Fix problems like low water pressure or a wobbly base.
Before You Begin: The Pro’s Checklist for a Flawless Installation
From my experience at SPRINGFAUCET, where we’ve designed and manufactured faucets for global markets for almost 20 years, I can tell you that 90% of installation problems start before a single tool is picked up. A few minutes of preparation saves hours of frustration.
1. Identify Your Sink Configuration
Look under your sink. How many holes are drilled into the countertop or the sink itself?
- One Hole: The most common setup for modern faucets.
- Three Holes: Typically for faucets with separate hot and cold handles. The holes are usually 4 inches or 8 inches apart (center-to-center).
- Two or Four Holes: Less common, often for a faucet plus a side sprayer, soap dispenser, or water filter switch.
Pro Tip: If you have three holes but bought a single-hole faucet, don’t panic! Most single-hole faucets come with an optional “deck plate” or “escutcheon” to cover the extra holes for a clean look. When designing products, we always consider including this small part, as it dramatically increases the faucet’s market compatibility.
2. Gather Your Tools
Having everything on hand prevents multiple trips to the hardware store.
| Must-Have Tools | Nice-to-Have Tools |
|---|---|
| Adjustable Wrench (or Basin Wrench) | Plumber’s Putty or Silicone Sealant |
| Phillips and Flathead Screwdrivers | Headlamp or Flashlight |
| Bucket and Old Towels | Safety Glasses |
| Penetrating Oil (for old, rusty parts) | Utility Knife |
| Cleaning Rag and Mild Cleaner | Putty Knife |
3. Shut Off the Water and Relieve Pressure
This is the most critical step.
- Locate the two water supply valves under your sink (one for hot, one for cold).
- Turn them clockwise until they are fully closed.
- Turn on the old faucet to drain any remaining water and release the pressure in the lines.
- Place a bucket and towels under the sink to catch any drips.
Understanding Your New Faucet: Single-Hole vs. Multi-Hole Installation
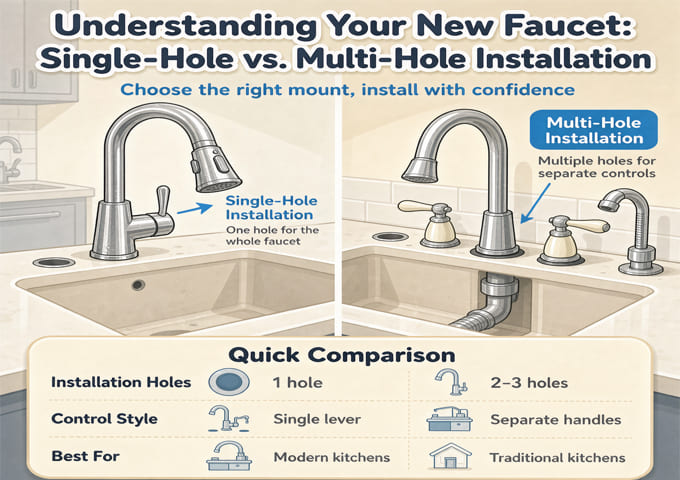
The type of faucet you choose dictates the installation process. As a manufacturer, we design these systems with different users and aesthetics in mind. Here’s what it means for you.
| Feature | Single-Hole Faucet | Three-Hole Faucet (Widespread) | What It Means For You |
|---|---|---|---|
| Appearance | Sleek, minimalist, modern. | Classic, traditional, symmetrical. | Your choice depends entirely on your kitchen’s style. |
| Installation | Faster and simpler. One set of connections to secure. | More complex. Requires aligning three separate components. | If you’re new to plumbing, a single-hole faucet is a more forgiving starting point. |
| Cleaning | Very easy. Just one base to wipe around. | More surfaces to clean around the base of each component. | For busy kitchens, the ease of cleaning a single-hole faucet is a significant advantage. |
| Cost | Generally more cost-effective to manufacture and purchase. | Often priced higher due to additional components and complexity. | The installation simplicity of single-hole models often translates to lower installation costs if hiring a pro. |
Recommended Image Filename: single-hole-vs-three-hole-kitchen-faucet.jpg Image Alt Text: A side-by-side comparison of a modern single-hole pull-down faucet and a classic three-hole faucet with separate handles.
Step-by-Step Guide: Installing a Single-Hole Kitchen Faucet
This is the most common type today, including pull-down and pull-out models. We’ll use our popular modern stainless steel kitchen faucet with a colored silicon pipe as an example, as its design is optimized for straightforward installation.
Step 1: Remove the Old Faucet
- Disconnect Supply Lines: Use your adjustable wrench to disconnect the hot and cold water lines from the shutoff valves. Have your bucket ready.
- Unscrew Mounting Nuts: This is often the hardest part. Lie on your back and use a basin wrench to loosen the nuts holding the old faucet to the sink. If they’re rusted, apply penetrating oil and wait 15 minutes.
- Lift Out the Faucet: Once the nuts are off, pull the old faucet and its gasket out from the top of the sink.
- Clean the Surface: Thoroughly clean the sink surface to ensure the new faucet has a perfect seal.
Step 2: Mount the New Faucet
- Feed the Hoses: From the top of the sink, guide the new faucet’s flexible water lines and threaded mounting shank through the hole. If using a deck plate, place it first.
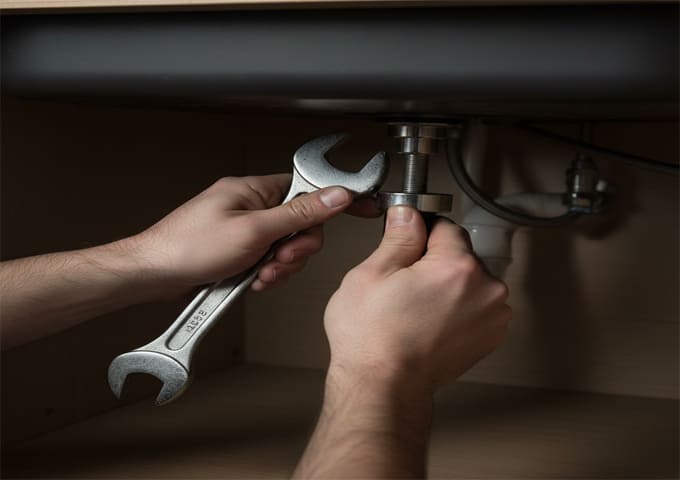
- Secure from Below: From under the sink, slide the rubber gasket, metal washer, and mounting nut onto the faucet’s shank.
- Tighten by Hand: Hand-tighten the mounting nut until it’s snug. Check the faucet’s alignment from above to ensure it’s straight.
- Final Tightening: Use your wrench to give the nut another quarter- to half-turn. Do not over-tighten! This can crack the countertop or damage the faucet. The goal is to make it snug so it doesn’t wobble.
Insider Tip: Many modern faucets, including those from SPRINGFAUCET, now use large, easy-to-grip plastic nuts or innovative tool-free installation systems. These are designed so you can tighten them sufficiently by hand, which is a huge benefit when working in the cramped space under a sink.
Step 3: Connect the Water Supply
- Connect Hot and Cold: The faucet’s supply lines are usually marked (red for hot, blue for cold). Connect the hot line to the hot valve and the cold line to the cold valve.
- Tighten Securely: Hand-tighten the nuts, then use a wrench to give them an additional quarter-turn. Again, snug is good, but overtightening can damage the rubber seals inside the connectors and cause leaks.
The Pull-Down Difference: Installing the Hose and Counterweight
This is a step that often confuses first-timers. The counterweight is what allows the pull-down sprayer to retract smoothly back into the spout.
- Connect the Spray Hose: Find the quick-connect fitting on the main water line coming down from the faucet spout. Push the spray hose connector onto it until you hear a distinct “click.” Give it a gentle tug to ensure it’s secure.
- Attach the Counterweight: This is the key to a functional pull-down faucet. Locate the marked area on the spray hose (or consult your manual). Clamp the counterweight onto the hose at this spot.
- Test the Motion: Pull the spray head down and let it go. It should retract smoothly without getting caught on pipes or the sides of the cabinet. If it doesn’t, adjust the weight’s position slightly higher or lower until it works perfectly.
Pro Tip: Before attaching the weight, let the hose hang down. The weight should be placed on the lowest part of the hose loop. This provides the maximum retraction force without causing the hose to snag on plumbing under the sink.
Mastering the Three-Hole Installation: What’s Different?
Installing a three-hole, or “widespread,” faucet involves a few extra steps, primarily focused on alignment.
- Mount the Components: Insert the hot handle, cold handle, and main spout into their respective holes. Secure each one from below with their gaskets and mounting nuts, just like with a single-hole faucet. Don’t fully tighten them yet.
- Connect the T-Connector: A three-hole faucet includes flexible hoses to connect the handles to the spout. Attach the hot and cold lines from the handles to the inputs of the “T-connector” (a T-shaped brass or plastic fitting). Then, connect the output of the T-connector to the spout’s inlet.
- Align and Tighten: From above, carefully align the handles and spout so they are perfectly straight and symmetrical. Once you are happy with the position, fully tighten the mounting nuts from underneath. This step may require a second person to hold the components in place from above while you tighten from below.
The Final Checks: How to Test for Leaks and Ensure Proper Function
You’re almost there! This final phase ensures your hard work pays off with a leak-free, perfectly functioning faucet.
- Turn the Water On Slowly: Open both water supply valves counter-clockwise, but only halfway. This slow introduction of pressure helps prevent a sudden “water hammer” shock to the system.
- Inspect for Leaks: With a flashlight, carefully inspect every connection point: where the supply lines meet the valves, and where they connect to the faucet. Run your fingers over the connections; sometimes you can feel a tiny drip before you see it.
- Fully Open the Valves: If there are no leaks, open the valves all the way.
- Test the Faucet: Turn the faucet handle on.
- Let the water run for a few minutes to flush out any air or debris in the lines. The water may “sputter” at first—this is normal.
- Test both hot and cold settings.
- If you have a pull-down model, test the sprayer functions and check the retraction again.
- Perform one final leak check under the sink.
A Manufacturer’s Perspective: Designing for Easy Installation
At SPRINGFAUCET, we don’t just sell faucets; we design and manufacture them as an OEM/ODM partner for brands worldwide. This gives us a unique perspective on what truly matters in faucet design.
“Easy installation isn’t a luxury; it’s a core feature,” says our Head of Product Development. “Every extra minute an installer spends under a sink is a cost to our B2B client’s project budget. Every confusing step is a potential negative review for their brand. That’s why we invest in features like color-coded water lines, tool-free mounting systems, and pre-attached hoses. For a product like our stainless steel kitchen faucet with a colored silicon pipe, the flexible silicon hose is not only a design element but also simplifies routing the hose during installation, preventing kinks.”
Our goal is to create products that make our clients’ brands look good long after the sale, and that starts with a positive first experience—the installation.
Troubleshooting Common Installation Problems
Even the best of us run into issues. Here’s a quick guide to solving the most common installation headaches.
| Problem | Likely Cause(s) | How to Fix It |
|---|---|---|
| Low Water Pressure | 1. Debris in the aerator. 2. Kink in a supply line. 3. Shutoff valves not fully open. |
1. Unscrew the aerator at the tip of the spout and rinse it out. 2. Check under the sink to ensure all hoses are straight. 3. Double-check that both valves are fully open (counter-clockwise). |
| Drip from Spout | 1. Debris in the valve/cartridge. 2. Defective cartridge. |
1. Turn off the water, remove the handle and cartridge, and rinse it with water. 2. If rinsing doesn’t work, the ceramic cartridge may need to be replaced (contact the manufacturer). |
| Leak at Faucet Base | 1. Mounting nuts are too loose. 2. Gasket is misaligned or damaged. |
1. Tighten the mounting nuts another quarter-turn. 2. If leaking persists, turn off water, loosen the faucet, and reseat or replace the base gasket. Applying a thin bead of plumber’s putty or silicone can also help. |
| Faucet Base is Wobbly | 1. Mounting nuts have loosened. 2. Uneven countertop surface. |
1. Get back under the sink and tighten the mounting nuts. 2. If the surface is uneven, you may need to use a shim and/or apply a bead of clear silicone around the base for stability. |
Frequently Asked Questions (FAQ) {#faq}
1. Do I need plumber’s putty or silicone sealant? It depends on the faucet. Many modern faucets use high-quality rubber gaskets that create a perfect seal without any sealant. However, if your sink surface is slightly uneven or you want extra insurance against leaks, a thin bead of 100% silicone sealant around the base of the faucet before you set it in place is a great idea. Always check the manufacturer’s instructions first.
2. The included water supply lines are too short. What do I do? This is a common issue in older homes. You can purchase faucet supply line extensions from any hardware store. They are available in various lengths and simply screw onto the end of your faucet’s existing lines.
3. How tight is “too tight” for the connections? A good rule of thumb is “hand-tight plus a quarter-turn” with a wrench. The goal is to compress the rubber gasket inside the fitting to create a seal. Overtightening can crack the nut or damage the gasket, which is a leading cause of leaks.
4. My old faucet is completely rusted on. What’s the best way to remove it? First, liberally apply a penetrating oil like WD-40 or PB Blaster to the mounting nuts and let it sit for at least 30 minutes (or even overnight). If a basin wrench still won’t work, your last resort may be to carefully cut the old nuts off with a small rotary tool and a cutting disc. Always wear safety glasses for this!
Conclusion: Your New Faucet Awaits
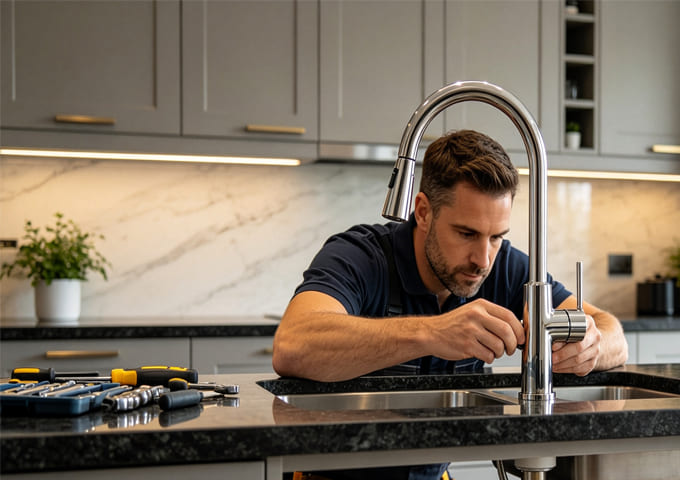
Installing a kitchen faucet is one of the most impactful DIY projects you can undertake. It’s a task that combines a little bit of plumbing, a dash of problem-solving, and results in a functional and aesthetic upgrade you’ll use every single day. By preparing properly, understanding your specific setup, and following the steps carefully, you can absolutely achieve a professional, leak-free installation.
Remember the key takeaways:
- Preparation is everything. Know your sink setup and have your tools ready.
- Always shut off the water first.
- “Snug” is the goal for all connections. Do not over-tighten.
- Test your work. Check for leaks at every connection point before calling the job done.
Whether you’ve chosen a simple, elegant single-hole faucet or a more complex widespread model, the principles remain the same. Take your time, be patient, and enjoy the satisfaction of a job well done. For businesses, understanding these nuances is key to selecting or designing products that delight customers from the moment they open the box.
Recommended Internal & External Links:
- Internal: Choosing The Right Kitchen Faucet Finish For Your Kitchen: A Complete Guide – Learn about materials, finishes, and features before you buy.
- Internal: Stainless Steel Faucets: Are They Worth It? – A deep dive into the material of our featured faucet.
- External: This Old House: How to Install a Faucet – A trusted external resource with video guides and expert tips.
- External: Wikipedia: Faucet – For a general history and technical overview of faucet mechanisms.
- External: PlumbingSupply.com: Basin Wrenches Explained – A guide on how to use the most essential (and sometimes trickiest) tool for this job.