

Thinking about upgrading your bathroom? Installing a new bathtub faucet is one of the most impactful and cost-effective ways to give your space a fresh look. But the fear of causing a hidden leak, cracking a tile, or turning a simple project into a plumbing disaster can be daunting.
The good news is, you don’t need to be a licensed plumber for most faucet replacements. With a few basic tools and this step-by-step guide, you can install a new bathtub faucet in under two hours. We’ll show you exactly how to do it—avoiding the common rookie mistakes that can lead to costly repairs.
This guide covers everything from preparing your workspace and removing the old fixture to installing two common types of bathtub faucets and ensuring a leak-free finish.
Last Updated: May 2026 | Estimated Reading Time: 16 minutes
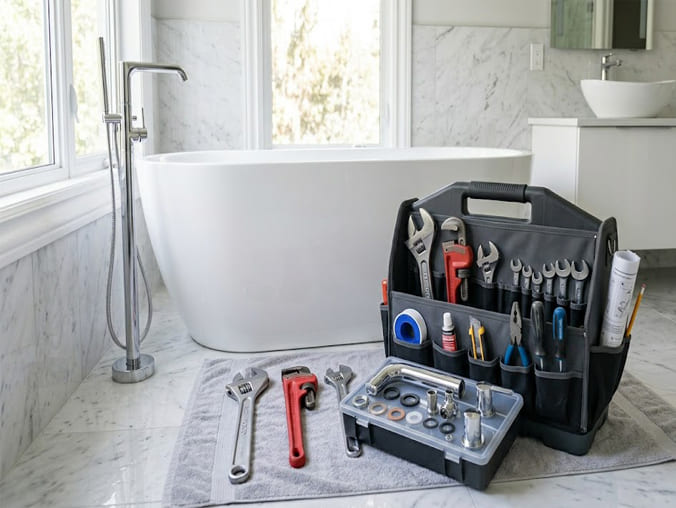
In This Guide, You Will Learn:
- How to identify your specific bathtub faucet type before you buy a replacement.
- A complete checklist of the tools and materials you’ll need.
- A step-by-step process for safely removing your old, stubborn faucet.
- Detailed installation instructions for both wall-mounted and deck-mounted (Roman tub) faucets.
- How to properly test your work and troubleshoot common leaks.
- Expert advice for B2B buyers on specifying faucets for large-scale projects.
Before You Begin: Identify Your Faucet Type
This is the most critical first step. Buying the wrong type of faucet is the #1 mistake DIYers make. The “guts” of the faucet (the valve) are very different for each type.
| Faucet Type | Description & Common Name | Installation Profile |
|---|---|---|
| Wall-Mounted | The most common type, often part of a tub/shower combo. The spout and handle(s) come out of the wall above the tub. | All plumbing, including the main valve, is located inside the wall. Installation involves working with a “trim kit” (the visible parts) that attaches to a rough-in valve. |
| Deck-Mounted | Also called a Roman Tub Faucet. The faucet is mounted directly on the tub surround or “deck.” Typically has a separate spout and two handles. | All plumbing is located underneath the tub deck. Installation requires an access panel or working from underneath to connect flexible water lines to the faucet body. |
| Freestanding | Also called a Tub Filler. This is a tall, floor-mounted faucet that stands independently next to a freestanding tub. | Plumbing comes up from the floor. This is a more complex installation that often requires a professional plumber to run pipes to the exact location before flooring is installed. |
Pro Tip: This guide focuses on the two most common DIY replacements: Wall-Mounted and Deck-Mounted. If you have a freestanding tub filler, we strongly recommend consulting a professional plumber due to the complexity of floor-based plumbing.
Tools & Materials Checklist
Gathering everything beforehand turns a frustrating job into a smooth one.
Essential Tools:
- Adjustable Wrench
- Phillips & Flathead Screwdrivers
- Hex Key / Allen Wrench Set (often included with the new faucet)
- Plumber’s Tape (Teflon tape)
- Bucket and Old Towels
- Utility Knife
- Flashlight
Optional but Highly Recommended:
- Basin Wrench (a lifesaver for deck-mounted faucet nuts)
- Penetrating Oil (like WD-40, for corroded old parts)
- Silicone Caulk & Caulking Gun (for a waterproof seal) -gital Caliper (for measuring pipe diameters precisely)
⚠️ Pro Safety Tip: Before you begin, lay a thick towel over the bathtub drain. It might seem trivial, but it’s the best way to prevent a tiny screw from disappearing down the drain—a mistake that turns a 1-hour job into a 5-hour nightmare. We’ve all been there.
Step 1: Preparation & Removing the Old Faucet
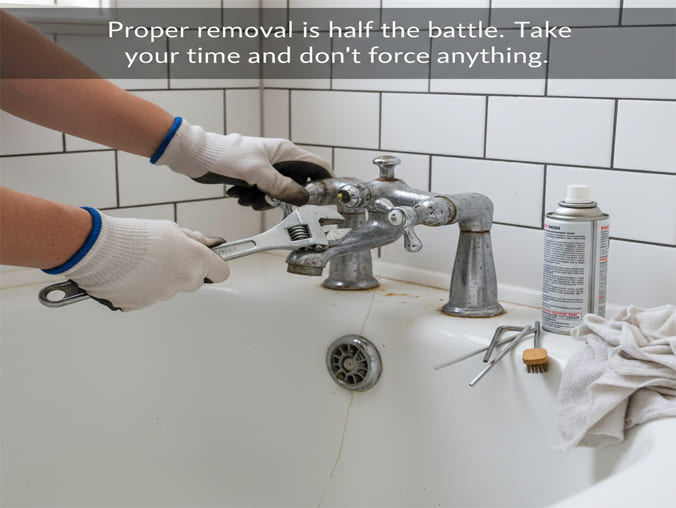
Proper removal is half the battle. Take your time and don’t force anything.
1: Turn Off the Water Supply
This is non-negotiable. Locate your home’s main water shut-off valve (often in the basement, garage, or a utility closet) and turn it clockwise until it’s fully closed. Then, open the bathtub faucet and any other faucet in the house to drain all remaining water from the pipes.
Manufacturer’s Insight: Most bathtubs do not have their own local shut-off valves like a sink or toilet. This is a design choice to prevent accidental shut-offs behind a finished wall. Always assume you need to use the main shut-off.
2: Remove the Faucet Handles and Trim
- Handles: Use a small flathead screwdriver or your fingernail to gently pop off the decorative index cap (the small cover labeled ‘H’ or ‘C’). This will expose the handle screw. Use a Phillips screwdriver to remove it, then pull the handle straight off the valve stem. If it’s stuck, wiggle it gently; avoid prying it with metal tools that can scratch the finish.
- Escutcheon Plate: This is the large decorative plate behind the handle. It’s usually held on by two long screws. Remove them, and the plate should come off. You may need to cut through old caulk with a utility knife.
- Spout: Look underneath the spout for a small hole. If you see one, it has a set screw (use a hex key to loosen it). If there’s no set screw, it’s a threaded spout. Wrap the spout in a towel (to protect the finish), grip it with your wrench, and turn it counter-clockwise to unscrew it from the pipe in the wall.
Step 2: Installing the New Faucet Assembly
This is where the process diverges based on your faucet type. Follow the section that matches your bathroom setup.
Option A: Installing a Wall-Mounted Faucet (Trim Kit)
This is the most common DIY project, as you are typically just replacing the visible “trim.”
- Clean the Surface: Thoroughly clean the wall surface and the protruding pipe of any old caulk, tape, or debris.
- Install the New Spout: If you have a threaded pipe, wrap the threads 3-4 times with plumber’s tape in a clockwise direction. This ensures the tape tightens as you screw on the spout. Screw the new spout on by hand until it’s snug and aligned, finishing with a wrench if needed (using a towel to protect the finish). If it uses a set screw, simply slide the new spout on and tighten the screw firmly.
- Attach the New Escutcheon: If your new faucet includes a foam or rubber gasket, ensure it’s in place. Slide the new escutcheon over the valve and secure it with the provided screws. Use a level to ensure it’s perfectly straight before the final tightening.
- Install the New Handle: Slide the new handle onto the valve stem, aligning it correctly (so “off” is in the proper position). Secure it with the new screw and snap the decorative cap into place.
Option B: Installing a Deck-Mounted (Roman Tub) Faucet
This requires working in the tight space under the tub deck. An access panel is essential.
- Position the Faucet Body: From above, insert the new faucet valve bodies (and the spout) into the holes on the tub deck. Ensure they are straight and properly aligned.
- Tighten the Mounting Nuts: This is the hardest part. From underneath (through the access panel), thread the mounting nuts and washers onto the faucet bodies. Hand-tighten them first. Once you’re happy with the faucet’s position from above, use a basin wrench to give each nut a final quarter-turn. Crucial Advice: Do not overtighten! This can crack the acrylic or porcelain of your tub deck, causing an unfixable leak. Snug is good; strained is bad.
- Connect the Water Supply Lines: Identify the hot and cold inlets on the faucet body (usually marked). Connect the flexible supply lines from your home’s water pipes to these inlets. Always start threading the connections by hand to prevent cross-threading. Once hand-tight, use an adjustable wrench for the final half-turn.
- Connect the Spout Hose: Connect the flexible hose that runs from the main valve body to the bottom of the spout. These are often quick-connect fittings that simply click into place. Give it a gentle tug to ensure it’s secure.
Step 3: Testing, Sealing, and Finishing Up
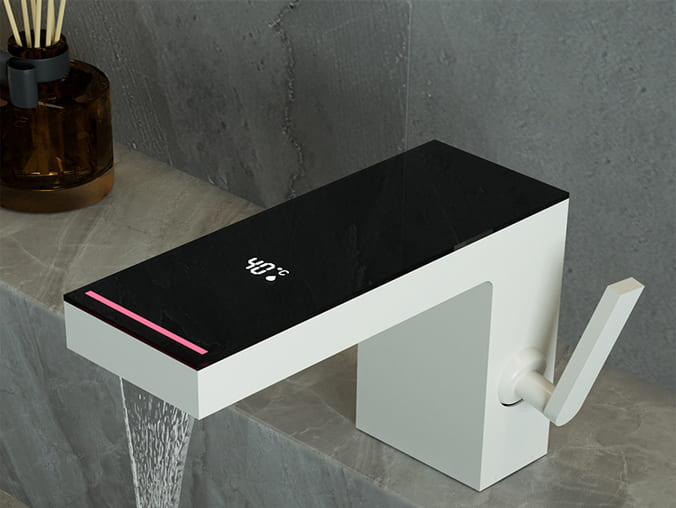
A successful installation is a leak-free one. Don’t skip this final check.
A: The Leak Test
- Close the newly installed faucet handle.
- Go to your main water shut-off and turn it back on slowly. Turning it on too fast can cause a “water hammer” effect—a loud bang that can damage pipes.
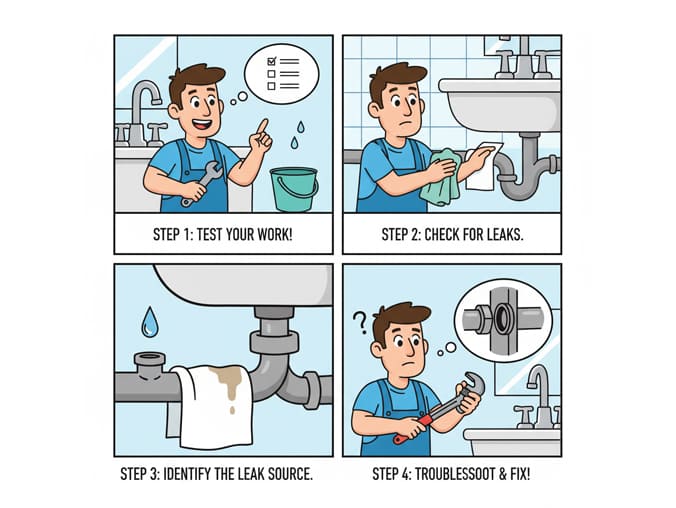
- Return to the tub. With a flashlight and a dry paper towel, methodically check every single connection point you touched: the supply line connections under the deck, the base of the handles, and around the spout. Dab each connection with the paper towel to check for even the smallest amount of moisture.
- Turn the faucet on. Run both hot and cold water. If you have a diverter for a shower, test it as well. Check for leaks again while the water is running.
B: Apply the Finishing Touches
Once you are 100% certain there are no leaks, it’s time for the final seal.
- For a wall-mounted faucet, apply a thin, neat bead of 100% silicone caulk around the top and sides of the escutcheon plate and spout where they meet the wall. Leave the bottom un-caulked to allow any potential moisture behind the plate to escape.
- For a deck-mounted faucet, apply a bead around the base of each handle and the spout where they meet the tub deck.
- Smooth the bead with a wet finger or a caulk finishing tool for a professional look. Let the caulk cure for 24 hours before exposing it to water.
For Business Buyers: Specifying Faucets for Projects
For developers, hotel managers, and distributors, faucet selection goes beyond aesthetics. It’s about long-term ROI, maintenance, and compliance.
As an OEM/ODM manufacturer with nearly 20 years of experience, SPRINGFAUCET works with B2B clients to address these critical factors. When specifying bathtub faucets for a large-scale project, consider:
| Specification Factor | What to Look For | Why It Matters for B2B |
|---|---|---|
| Valve System | Universal Valve Compatibility. Look for faucets that use a standardized rough-in valve body across multiple trim styles. | This allows you to install the plumbing early and choose/update the visible trim later, reducing costs and simplifying future renovations for an entire property. |
| Regional Compliance | Certifications like WRAS (UK), DVGW (Germany), cUPC (US/Canada). Flow rate adherence (e.g., specific L/min for European markets). | Non-compliance can halt a project. A partner like SPRINGFAUCET ensures products, such as their popular Bathtub Faucet for EU/ME markets, meet all local legal and performance standards. |
| Durability & Materials | Solid brass or SUS304 stainless steel construction. High-quality ceramic disc cartridges. PVD finishes for high-use areas. | Reduces maintenance calls, replacement costs, and protects brand reputation. A cheap, failing faucet reflects poorly on the entire property. |
| Maintenance | Ease of access to serviceable parts (cartridges, aerators). Availability of spare parts from the manufacturer. | Minimizes downtime and labor costs for the maintenance team. A faucet that’s easy to repair is more valuable than one that must be fully replaced. |
Partnering with an experienced ODM like SPRINGFAUCET allows you to leverage proven designs and manufacturing expertise to create a reliable and cost-effective product line for your specific market.
Troubleshooting: Why Is My New Faucet Leaking?
Don’t panic! Most post-installation leaks are easy to fix.
| Problem | Likely Cause | The Solution |
|---|---|---|
| Leak from Handle Base | Packing nut is loose, or O-ring is unseated/dry. | Turn off water. Remove handle. Use a wrench to slightly tighten the large nut behind it. If it still leaks, disassemble and apply plumber’s grease to the O-rings. |
| Drip from the Spout | Debris flushed from pipes is caught in the new cartridge. | This is common. Turn the handle on and off several times from hot to cold to flush the debris. If it persists, you may need to remove and rinse the cartridge. |
| Low Water Pressure | Aerator is clogged with debris. | The first rush of water often dislodges minerals from old pipes. Unscrew the aerator at the tip of the spout and rinse the screen clean. |
| Leak at Supply Line | Connection is not tight enough, or the threads are crossed. | Turn off water immediately. Loosen the connection. Ensure it’s straight, then re-thread by hand before tightening with a wrench. Check the rubber gasket inside the nut. |
Conclusion & Final Thoughts
Installing a new bathtub faucet is a highly rewarding weekend project that instantly boosts your bathroom’s style and functionality. By identifying your faucet type, preparing your tools, and following these systematic steps, you can confidently tackle this upgrade and avoid the common pitfalls. You’ve not only saved money on a plumber but also gained valuable home improvement experience.
Enjoy the satisfaction of a job well done every time you step into your newly refreshed bathroom.
Have you successfully installed your own bathtub faucet? Do you have any pro tips or questions from your own experience? Drop a comment below—we’d love to hear from you!
Recommended Internal & External Links:
- Internal: The Ultimate Guide to Faucet Finishes: PVD vs. Chrome – Learn which finish is right for your bathroom’s durability needs.
- Internal: Understanding Faucet Valves: High Quality Ceramic Cartridge is Non-Negotiable – A deep dive into the heart of your faucet.
- External: Wikipedia: Teflon Tape (Plumber’s Tape) – Understand the material science behind this crucial plumbing supply.
- External: This Old House: How to Solder Copper Pipe – An authoritative guide for the advanced DIYer tackling wall-mounted valves.
- External: PlumbingSupply.com: Basin Wrench Guide – A visual guide on how to use this essential but tricky tool.