
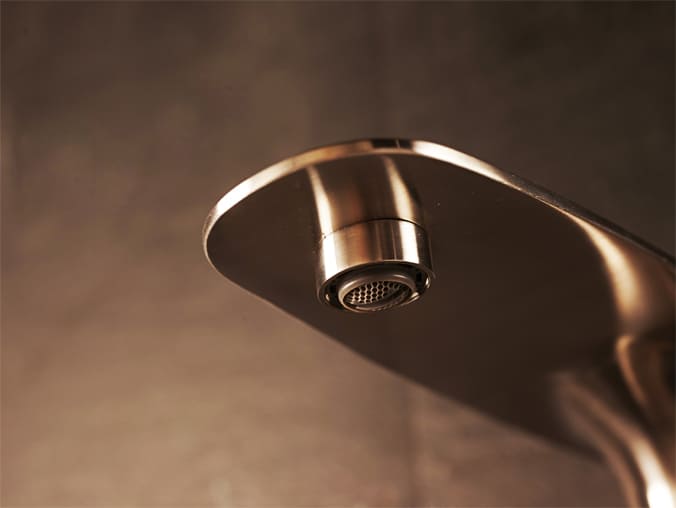
Is your faucet sputtering, spraying water sideways, or suffering from frustratingly low pressure? Before you call a plumber, there’s a 90% chance you can fix it yourself in under 20 minutes for free. The culprit is almost always a clogged faucet aerator.
To clean a faucet aerator, you simply unscrew it from the faucet tip (use a rag and pliers if needed), carefully disassemble the parts, and soak them in a small bowl of white vinegar for 15-30 minutes. This dissolves the mineral buildup. After soaking, scrub the parts with an old toothbrush, rinse thoroughly, and reassemble. This simple maintenance can dramatically restore your water pressure and flow.
This guide will walk you through every step, from the tools you’ll need to troubleshooting stubborn issues, ensuring you can tackle this job with confidence.
Last Updated: May 2026 | Estimated Reading Time: 13 minutes
In This Guide, You Will Learn:
- What a faucet aerator is and why it gets clogged.
- The simple tools and materials needed for the job.
- A 4-step guide to remove, clean, and reinstall your aerator perfectly.
- How to clean an aerator without removing it—a trick for stubborn fixtures.
- When to clean versus when it’s time to replace the aerator.
- Expert answers to common problems and questions.
First, What Is a Faucet Aerator and Why Does It Clog?
Before we dive in, let’s understand the part we’re fixing. A faucet aerator is the small, often overlooked attachment with a mesh screen screwed onto the tip of your faucet spout. It’s not just a filter; its primary jobs are to:
- Shape the water stream into a non-splashing, soft flow.
- Conserve water by mixing air into the water stream.
- Filter out sediment and debris from your water pipes.
Over time, this little part gets clogged with mineral deposits (calcium and magnesium, also known as limescale or “hard water buildup”) and small particles of sediment or rust from the water lines. This buildup is what restricts water flow and causes the stream to spray erratically.
A Note From Our Manufacturing Team: After any plumbing work in your home or building, it’s common for sediment to be dislodged inside the pipes. This debris travels to the nearest exit—your faucet—and gets trapped in the aerator. We always advise cleaning your aerators immediately after any plumbing repairs.
Preparation: What You’ll Need
Gathering your tools beforehand makes this a quick and easy job. You likely have everything you need already.
| Tool / Material | Purpose | Pro Tip |
|---|---|---|
| Small Bowl | For soaking the aerator parts. | A clear glass bowl lets you see the vinegar working its magic. |
| White Vinegar | The acidic nature safely dissolves mineral deposits. | You don’t need a lot; just enough to submerge the parts. |
| Old Toothbrush | For scrubbing away loosened grime. | A child’s toothbrush is great for getting into small components. |
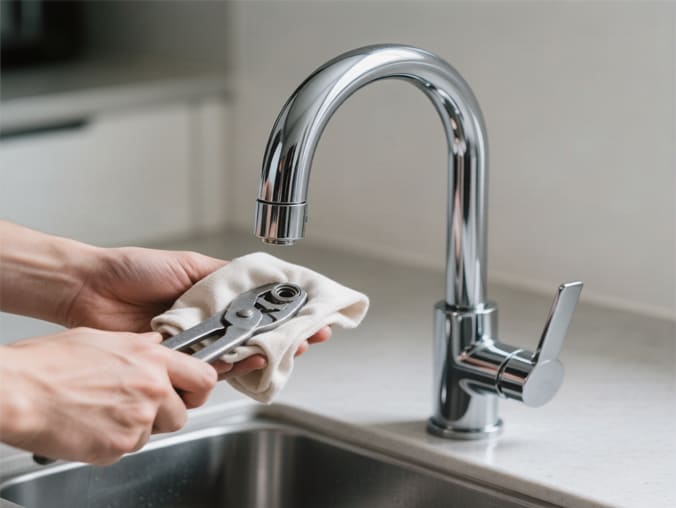
| Adjustable Pliers or Wrench | To loosen a tight aerator. | Crucial: Always wrap the aerator or the tool’s jaws in a rag or painter’s tape to prevent scratching the finish! |
| Soft Rag or Cloth | For protecting the faucet finish and gripping. | Also used to plug the sink drain. |
| Safety Pin or Paperclip | For poking out stubborn debris from the mesh screen. | A wooden toothpick also works well and is less likely to damage the screen. |
Most Important Step: Before you start, place a rag or a sink stopper over the drain opening. Faucet aerators have small washers and screens that are very easy to lose down the drain. This one simple action can save you a huge headache.
Step-by-Step: How to Remove and Clean Your Faucet Aerator
This process is straightforward and can be done in four simple steps. We’ll cover options for both standard and hidden aerators.
Step 1: Remove the Aerator (With and Without Tools)
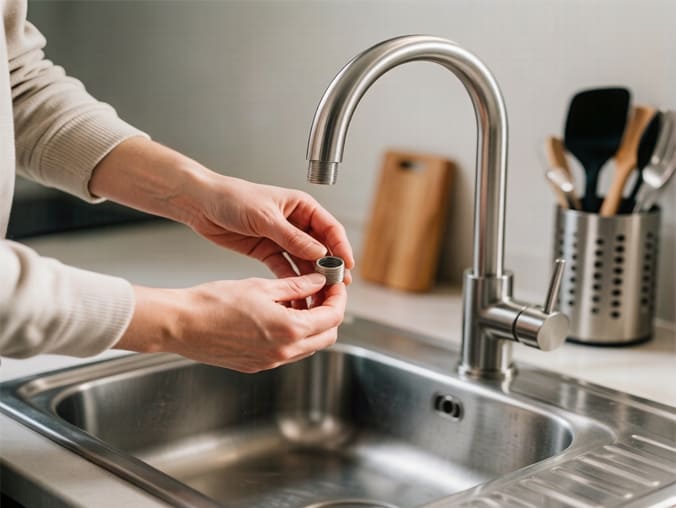
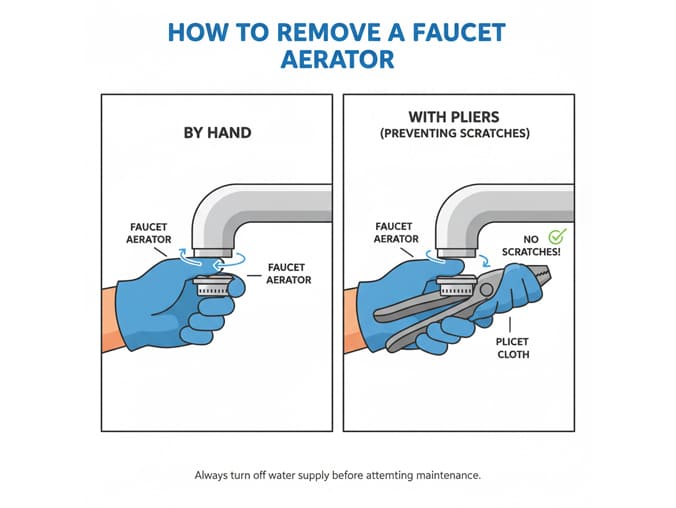
Most aerators can be removed by hand. Grip the aerator housing at the tip of the faucet and turn it counter-clockwise (lefty-loosey).
If it’s too tight due to mineral buildup:
- Wrap your soft rag around the aerator housing to protect the metal finish.
- Gently grip the rag-covered aerator with your adjustable pliers or wrench.
- Apply slow, steady pressure counter-clockwise until it breaks loose. Then, finish unscrewing it by hand.
What if my aerator is hidden? Some modern faucets, especially bathroom faucets, have a “hidden” or “cache” aerator for a seamless look. You won’t be able to grip this with pliers. You’ll need a special aerator key, which often comes with the faucet. If you’ve lost it, they are inexpensive and available at any hardware store. Simply insert the key into the slots and turn counter-clockwise.
Step 2: Disassemble and Inspect the Parts
Once removed, carefully lay out the aerator components on your rag. A typical aerator consists of:
- The outer metal or plastic housing.
- A top rubber washer (this creates the seal).
- One or more mesh screens and a flow restrictor.
Pro Tip: Take a quick photo of the parts in the order you disassembled them. This simple trick makes reassembly foolproof.
Inspect the parts. Is the rubber washer cracked or brittle? Is the mesh screen torn or heavily corroded? If so, cleaning won’t be enough, and it’s time to consider a replacement (more on that later).
Step 3: Soak and Scrub Away Mineral Deposits
This is where the magic happens.
- Place all the disassembled parts (except the rubber washer, to be safe) into your small bowl.
- Pour in enough white vinegar to completely submerge them.
- Let them soak for 15-30 minutes. You’ll see tiny bubbles as the acetic acid in the vinegar dissolves the calcium carbonate.
- After soaking, use the old toothbrush to scrub away any remaining debris from the screens and housing.
- If any holes in the mesh are still clogged, gently poke them clear with your safety pin or toothpick.
- Rinse all parts thoroughly under warm water to remove the vinegar and any loose particles.
No-Removal Cleaning Method: What if the aerator is completely stuck? Use the “baggie method”:
- Fill a small plastic sandwich bag with vinegar.
- Carefully lift the bag up and over the faucet spout, ensuring the aerator is fully submerged.
- Secure the bag to the faucet with a rubber band.
- Let it soak for 30 minutes, then remove the bag and run the hot water at full blast for a minute to flush out the loosened debris.
Step 4: Reassemble and Test the Water Flow
- Following your photo, reassemble the parts in the correct order. The rubber washer always goes on top.
- Screw the aerator back into the faucet clockwise (righty-tighty). Hand-tighten it until it’s snug. Avoid over-tightening with pliers, as this can damage the washer.
- Remove the rag from your drain.
- Turn on the water. Let it run for a moment to flush any final particles. The stream should now be clear, full, and splash-free. Check for any small leaks around the aerator; if you see one, tighten it just a little bit more.
Beyond Cleaning: Aerator Materials & When to Upgrade
While most aerators are made of chrome-plated brass, the material can vary, especially in different markets or for specific applications.
For example, in regions with very humid climates or for entry-level product lines, ABS plastic aerators are a smart choice. They are completely resistant to corrosion and rust. As an OEM/ODM manufacturer with nearly 20 years of experience, SPRINGFAUCET often recommends ABS components for faucets designed for markets like South America, where durability against humidity is key. A high-quality ABS faucet, like our popular Basin Faucet model, provides excellent performance and longevity in these conditions.
| Problem | Likely Cause | Solution |
|---|---|---|
| Water stream is still weak after cleaning. | 1. Severe clogging inside the faucet body itself. 2. Low house water pressure. | 1. Remove aerator and run water to flush the line. If flow is still weak, the issue is further back in the plumbing. 2. A replacement aerator with a higher GPM rating may help (check local codes). |
| Aerator is leaking from the sides. | 1. Rubber washer is missing, damaged, or installed incorrectly. 2. Aerator is not tightened enough or is cross-threaded. | 1. Disassemble and check the washer. Replace if damaged. 2. Unscrew and carefully re-thread, ensuring it goes on straight. Hand-tighten firmly. |
| Mesh screen is torn or corroded. | Age, harsh chemicals, or aggressive cleaning. | Replace the aerator. A damaged screen cannot be repaired and will provide poor performance. Aerators are inexpensive (5−5-10). |
FAQ: Common Faucet Aerator Problems Solved
This section directly answers the most common questions people ask about this process.
How often should I clean my faucet aerator? For most households, a good rule of thumb is every 6 months. However, if you live in an area with very hard water or notice a drop in pressure sooner, you may need to clean it every 3-4 months.
Can I clean my faucet aerator without vinegar? Yes. You can use a dedicated CLR (Calcium, Lime, Rust) remover, but be sure to follow the product’s instructions and rinse thoroughly. For a non-chemical approach, you can use a stiff brush and a safety pin to manually remove the debris, though it is less effective at dissolving unseen mineral scale.
Should I just replace the aerator? You should replace the aerator if:
- The mesh screen is torn, bent, or has holes.
- The rubber washer is cracked, hard, or missing.
- The housing is cracked or severely corroded.
- Cleaning does not restore proper water flow.
- For hygiene reasons (e.g., in a kitchen where you drink from the tap), replacing it every 1-2 years is a good, low-cost practice.
What size faucet aerator do I need? Aerators come in two standard sizes: regular (the size of a quarter) and junior (the size of a dime). The easiest way to get the right size is to take your old aerator with you to the hardware store to find a perfect match.
Conclusion: A Simple Fix for a Better Kitchen and Bath
Maintaining your faucet aerator is one of the quickest, cheapest, and most satisfying DIY tasks you can do. In less than 20 minutes, you can solve the common issues of low water pressure and erratic spray, restoring your faucet to like-new performance.
By making this a regular part of your home maintenance routine every six months, you not only improve your daily experience but also extend the life of your fixtures and conserve water. For businesses and developers, specifying faucets with high-quality, easily serviceable components from a trusted manufacturer like SPRINGFAUCET ensures long-term tenant satisfaction and lower maintenance costs.
Did this guide help you fix your faucet? Let us know your success story in the comments below!
Recommended Internal & External Links:
- Internal: How to Romove a Faucet Aerator – A Step by step by manufacturer’s Guide.
- Internal: Top 10 Faucet Aerator Brands the Manufacturers Behind Them – Who actually makes the best faucet aerators.
- External: USGS – Hardness of Water – An authoritative resource from the U.S. Geological Survey explaining what hard water is.
- External: Home Depot – Aerator Replacement Parts – A direct link to a retail page where users can purchase replacement aerators and keys.
- External: Wikipedia – Faucet Aerator – For a technical and historical overview of the component.