
Is your kitchen or bathroom faucet sputtering, spraying sideways, or delivering a weak, frustrating stream of water? Before you think about calling a plumber or buying a new faucet, the solution is likely right in your pantry. In most cases, a simple cleaning is all it takes to restore your faucet to its full, powerful flow.
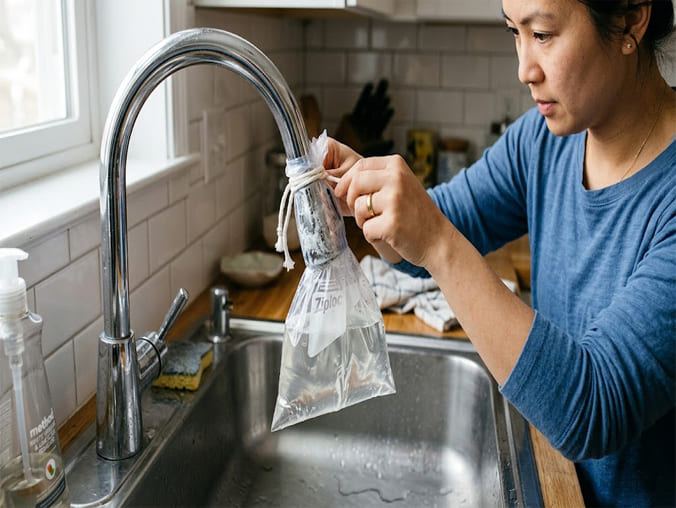
For the fastest fix, fill a sandwich bag with white vinegar, secure it over the faucet head so the nozzles are completely submerged, and leave it for 30-60 minutes. Afterward, scrub the nozzles with an old toothbrush and flush with hot water. For a deeper clean, you’ll need to unscrew the aerator or spray head, disassemble the parts, soak them, and reassemble.
This guide will walk you through every step for every type of faucet, from a quick fix to a deep-clean restoration.
Last Updated: June 2026 | Estimated Reading Time: 17 minutes
Is This Your Problem? A Quick Diagnostic
If you’re experiencing any of the following, this guide is for you. These are the classic signs of a clogged faucet head, typically caused by mineral buildup (limescale) and sediment from your water supply.
- Weak Water Pressure: The flow has gradually decreased over weeks or months.
- Sideways or Uneven Spray: Water shoots out at odd angles, splashing your counter or mirror.
- Visible Mineral Buildup: You can see a white, chalky, or greenish crust around the spray nozzles.
- Split Stream: The single stream of water is now split into multiple, weaker streams.
- Faucet Drips Briefly After Shutoff: Water trapped behind the clog slowly trickles out.
The good news is that this is rarely a sign of a broken faucet. It’s simply a clog that you can easily fix yourself.
First, Know Your Faucet Type
To clean your faucet effectively, you first need to identify which type you have. The method varies slightly depending on where the clog-prone parts are located.
| Faucet Type | Key Identifier & Common Location | Where the Clog Lives |
|---|---|---|
| ① Standard Fixed Spout | A stationary spout with a small, screw-on tip. (Most bathroom & utility sinks). | The aerator, a small mesh screen assembly at the very tip of the spout. |
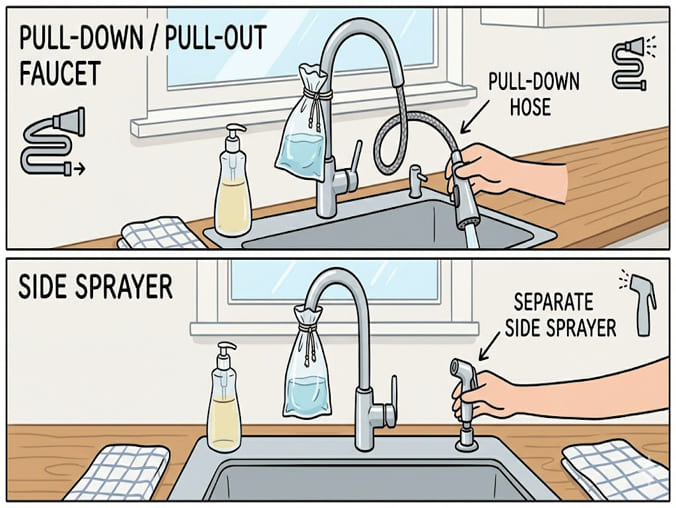
| ② Pull-Down Faucet | A high-arc spout with a spray head that pulls down into the sink. (Most modern kitchens). | The spray head face (nozzles), an internal screen filter where the hose connects, and a flow regulator. |
| ③ Pull-Out Faucet | A lower-profile spout where the entire head pulls out horizontally. (Smaller kitchens). | Same internal parts as a pull-down model: spray head, screen filter, and regulator. |
| ④ Side Sprayer | A separate, smaller spray nozzle located beside the main faucet. | Its own nozzle head and a screen filter where it connects to its hose under the sink. |
30-Second ID Trick: Look at your sink. Does the tip of the spout look like it can be unscrewed? That’s a standard aerator. Can you pull a hose out of the main faucet? That’s a pull-down or pull-out. Do you have a separate sprayer to the side? That’s a side sprayer.
What You’ll Need: The Ultimate Faucet Cleaning Toolkit
Gather these simple supplies before you start. Having everything ready makes the process quick and painless.
| Supply | Why It’s There | Can You Skip It? |
|---|---|---|
| White Distilled Vinegar (5%) | Chemically dissolves calcium and limescale without harsh abrasives. | ❌ Essential. The core of the cleaning process. |
| Small Bowl OR Sandwich Bag & Rubber Band | A bowl for soaking disassembled parts; a bag for the no-remove method. | ❌ Essential. You need one or the other. |
| Old Toothbrush / Soft Nylon Brush | For scrubbing the mineral deposits off screens and nozzle holes. | ❌ Essential. Manual agitation is key. |
| Toothpick or Wooden Skewer | To poke out debris from individual clogged spray holes. | A paperclip can work, but use it gently to avoid scratching. |
| Adjustable Wrench / Pliers & Soft Cloth | To grip and remove a stuck aerator without scratching the finish. | Only needed if the part is stuck fast. |
| Dish Soap | Helps break down greasy buildup on kitchen faucet spray heads. | Recommended for kitchen faucets. |
| Microfiber Cloth | For a final polish and drying to prevent water spots. | Optional, but gives a professional finish. |
⚠️ A CRITICAL WARNING ON FINISHES Not all faucet finishes are created equal. As manufacturers, we know that specialty finishes require special care.
- Matte Black, Brushed Gold, Oil-Rubbed Bronze: These are often PVD coatings or powder coats. Limit direct vinegar contact to 30 minutes max. Prolonged exposure can cause discoloration.
- Chrome & Stainless Steel: These are very durable and can handle longer soaks (several hours or overnight) without issue. When in doubt, always test on a hidden spot first!
METHOD A: The 5-Minute “No-Remove” Vinegar Bag Trick
This is the go-to method for routine maintenance or when your aerator is stuck. It’s incredibly effective for light-to-moderate buildup.
- Fill the Bag: Pour about half a cup of white vinegar into a sandwich-sized plastic bag.
- Submerge the Head: Carefully slip the bag over the faucet head, ensuring the clogged nozzles or aerator are completely submerged in the vinegar.
- Secure It: Use a rubber band (or two, for a heavy pull-down head) to secure the bag tightly around the faucet spout.
- Wait: Let it soak for 30-60 minutes. For extremely crusty buildup, you can go up to 2 hours on chrome or stainless steel finishes.
- Scrub and Flush: Remove the bag. Use an old toothbrush to scrub the face of the faucet head, dislodging the softened mineral deposits. Finally, run hot water at full blast for one minute to flush out any remaining debris.
This method works wonders, but if your water pressure is still low, it means the clog is deeper inside. It’s time for Method B.
METHOD B: The Deep Clean (Disassembly Required)
This method involves taking the head apart to clean every component thoroughly. It guarantees the best results for severe clogs.
5A — For Standard Fixed Spouts (Most Bathroom Faucets)
- Protect the Drain! Place a rag or drain stopper in the sink basin. Aerator parts are tiny, expensive to replace, and love to disappear down the drain.
- Unscrew by Hand: Try to unscrew the aerator housing at the tip of the spout counter-clockwise. Most are only hand-tight.
- If Stuck: Wrap a soft cloth around the aerator housing to protect the finish. Use an adjustable wrench or pliers to gently grip and turn it. A little leverage is all you need.
- Lay Out Parts: Carefully disassemble the aerator on your rag, noting the order. You’ll typically find a housing, a metal or plastic screen, and a rubber washer.
- Soak: Place all metal and plastic parts in a small bowl of vinegar for at least 30 minutes (or overnight for heavy buildup on chrome/stainless).
- Scrub & Poke: Use your toothbrush to scrub the screen on both sides. Use a toothpick to poke out any stubborn debris from the mesh holes.
- Rinse & Reassemble: Rinse all parts thoroughly under water. Reassemble them in the exact reverse order you took them apart. Screw the aerator back on hand-tight.
Pro Tip: Not sure what size aerator you have for a replacement? Use the coin test! If it’s the diameter of a quarter, it’s a “Regular” size. A nickel is a “Junior” size, and a dime is a “Tom Thumb” size.
5B — For Pull-Down & Pull-Out Spray Heads (Most Kitchen Faucets)
These heads are slightly more complex, but the principle is the same.
- Extend & Clamp the Hose: Pull the spray head out a few feet. To prevent the hose from retracting back into the faucet body, clip a clothespin or a small binder clip onto the hose right where it exits the spout.
- Unscrew the Head: The spray head simply unscrews from the hose connector (counter-clockwise). It should be hand-tight. If stuck, use a strap wrench or a cloth-wrapped pair of pliers on the textured part of the connector, not the finished head itself.
- Inspect Internals: Look inside the threaded end. You’ll likely see a small screen filter and possibly a plastic flow restrictor. Carefully pry these out with a small screwdriver or your fingernail.
- Soak & Scrub: Soak the spray head and internal parts in vinegar. Use your toothbrush on the exterior nozzles and the internal screen.
- Poke Every Hole: This is key for spray heads. Use a toothpick to methodically clear every single silicone or plastic spray nozzle from the outside.
- Check the Washer: Inspect the black rubber washer on the hose connector. If it’s cracked or flattened, it needs to be replaced to prevent leaks.
- Reassemble & Flush: Reassemble the parts, screw the head back on hand-tight, and remove the clamp from the hose.
Manufacturer’s Tip: After reassembly, run hot water in STREAM MODE first for 30 seconds. This flushes any large, loosened debris straight out. Then, switch to spray mode. If you go to spray mode first, you risk clogging the clean nozzles immediately. Modern designs like the SPRINGFAUCET Pull-Down Faucet use easy-clean silicone nozzles that simplify this process immensely.
5C — For Side Sprayers
- Unscrew the Head: You can usually just unscrew the sprayer head from its hose at the top. If the entire hose assembly needs cleaning, you’ll need to disconnect it from the diverter valve under the sink.
- Soak and Scrub: The process is the same: soak the head in vinegar, scrub the nozzle face with a toothbrush, and poke the holes clear.
- Check the Hose: If pressure is still weak, the clog may be in the hose itself or the diverter.
Decision Time: Bag Method vs. Full Disassembly
| Factor | Vinegar Bag Method | Full Disassembly |
|---|---|---|
| Time Investment | ~5 minutes setup, 30-60 min wait | 15-30 minutes active work |
| Best For | Routine cleaning, light buildup, stuck aerators, renters. | Severe clogs, very low pressure, annual deep cleaning. |
| Tools Required | Bag, vinegar, rubber band. | Wrench (maybe), toothbrush, toothpick, bowl. |
| Risk Level | Near zero. Safe for all finishes with timed exposure. | Low, but risk of scratching finish or losing small parts. |
“I Cleaned It, But My Water Pressure Is STILL Low!”
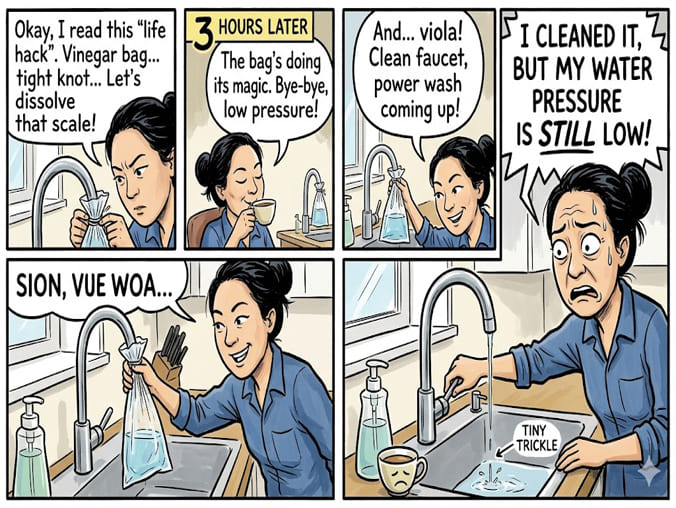
If a thorough cleaning didn’t solve the problem, don’t despair. Work through this tiered troubleshooting guide before calling a professional.
- Aerator/Spray Head (You Are Here): You’ve already cleaned this. Double-check that you reinstalled all parts correctly.
- Supply Valves: Look under your sink. There are two valves (hot and cold). Ensure their handles are turned fully counter-clockwise (fully open). Sometimes they get partially closed by accident.
- Supply Hoses: The flexible hoses connecting the valves to the faucet can also get clogged. This is an intermediate DIY task. Turn off the water, disconnect the hoses from the faucet, point them into a bucket, and briefly turn the water on to flush them out.
- Faucet Cartridge: This is the internal valve of the faucet. If it’s clogged with debris or has worn out, it can restrict flow to the entire faucet. Replacing a cartridge is a common DIY repair.
- Whole-Home Issue: If all faucets in your house have low pressure, the problem is likely with your home’s pressure-reducing valve (PRV) or an issue with the municipal supply. This is a job for a plumber.
Prevention: How to Stop Clogs Before They Start
An ounce of prevention is worth a pound of cure (and a lot less scrubbing).
| Your Situation | Recommended Cleaning Frequency |
|---|---|
| You have soft water. | Quick vinegar bag soak or wipe-down every 3-4 months. |
| You have hard water. | Quick wipe-down every month. Deep clean every 2-3 months. |
| You just had plumbing work done. | Clean your faucet heads immediately. Sediment gets stirred up and will clog them fast. |
Top Prevention Tips:
- Wipe it Dry: After the last use of the day, wipe the faucet head with a microfiber cloth. This prevents mineral-rich water from evaporating and leaving deposits.
- Massage the Nozzles: If your faucet has soft rubber/silicone nozzles, gently massage them with your fingertip once a week. This breaks up any nascent mineral buildup inside.
- Consider a Water Softener: If you live in a very hard water area, a whole-house water softener is the ultimate solution for protecting all your plumbing and appliances.
Frequently Asked Questions (FAQ)
Can I use CLR or another chemical cleaner instead of vinegar? Yes, but with caution. Products like CLR are much stronger acids. Wear gloves, ensure good ventilation, limit contact time to just a few minutes, and rinse the parts extremely thoroughly. They can be harsh on rubber gaskets and specialty finishes.
Is bleach safe for cleaning faucet heads? No. Bleach is excellent for disinfecting but does nothing to dissolve mineral deposits like limescale. It can also degrade rubber seals and damage certain finishes. Vinegar is the right tool for this specific job.
Should I remove the flow restrictor to get more pressure? You can, and many people do. However, be aware that it’s there to meet water conservation standards (like WaterSense). Removing it will increase your water usage and bill. Often, just cleaning the restrictor and aerator screen is enough to restore the feeling of strong pressure.
What if my recessed aerator is stuck and a wrench can’t grip it? First, try the vinegar bag method for a longer period (2-3 hours). If that doesn’t work, you’ll need to buy a cheap aerator key. It’s a small, slotted tool that fits inside the spout to grip the recessed aerator and turn it.
A Clean Faucet, A Better Kitchen
Keeping your faucet head clean is one of the easiest and most satisfying home maintenance tasks. It requires no special skills, costs next to nothing, and has an immediate, noticeable impact on your daily routine.
If you find that your faucet parts are corroded beyond saving, it might be time for an upgrade. For your next faucet, consider one with easy-to-clean silicone nozzles and a high-quality, corrosion-resistant finish.
Recommended Internal & External Links:
- Internal: How to Choose the Best Kitchen Faucet in 2026 – Our comprehensive guide to upgrading your hardware.
- Internal: From the Factory: Understanding Faucet Finishes (PVD vs. Chrome) – An expert look at what makes a finish last.
- External: USGS – Water Hardness Information – An authoritative resource to understand the water quality in your area.
- External: The Spruce – How to Replace a Faucet Cartridge – A reliable third-party guide for the next step in troubleshooting.
- Product: SPRINGFAUCET Modern Stainless Steel Pull-Down Faucet – An example of a faucet designed with easy-clean nozzles and durable materials.